Illustration

The Ultimate Portrait Drawing Course - Beginner to Advanced

By Doop

$161.00 $179.00
Recorded
33 lessons
Running time
6h 24m
Class Kit
Available
Feedback
By Creator
$161
List: $179
(10% Off)

Only -11189 pieces in stock!

Buy One, Get One

We are offering this chance only to the first 100 classmates. Enjoy the promotion before it’s too late.

1. Learn at your own pace in this 20-week online course.
2.
Artistic guidance & feedback from the artist herself
3. Engaged & supportive community of peers to exchange feedback.
4. English subtitles (Original audio in Korean)

5. Enroll now to start learning right away!

Step 01 : Everything you need to know about the pencil

Let’s learn how to hold the pencil and draw various types of lines

Step 02 : The basics of visage

Let’s learn about facial proportions, symmetry, and margins

Step 03 : Creating tone with a pencil

Let’s learn how to utilise lines and smearing to create tone

Step 04 : Drawing Facial Features: Eyes

Let’s learn how to draw eyes and graceful eyebrows/eyelashes

Step 05 : Drawing Facial Features: Ears/Nose

Let’s learn how to draw natural-looking ears and noses

Step 06 : Tips for Drawing at an Angle

Drawing at an angle is not as hard as you think

Welcome!


  1. Introducing the course
  2. Meet Doop: illustrator, artist, and instructor
  3. Let’s look at the materials needed for this course
  4. Sharpening with a knife instead of a pencil sharpener

01. The Basics: The Pencil and Drawing Lines


  1. About Pencils: Characteristics of HB/3B/6B pencils
  2. How to create lines with a pencil: Pressure, Thickness, and Length
  3. Assembling lines to create the perfect portrait

02. The Basics: Depth, Lines, and Texture


  1. Learn about the secrets of contrast with richness and depth: the ratio of brightness
  2. Express depth by overlapping lines: Hatching
  3. Express depth using the blur effect: Smudging
  4. TIP: Setting mood and tone (TIP: Why tone smudges and becomes cloudy)

03. The Basics: The Shape of the Face


  1. Let’s learn about the basic structure of the face and tips for positioning the facial features
  2. Three important things when creating a portrait: Ratio, Symmetry, and Margins
  3. TIP: Drawing each side of the face

04. The Basics: For Natural eyes, nose and mouth


  1. Learn about the foundation when sketching the eyes, nose, and mouth
  2. Learn about the various details in the eyes: The pupils, iris and the eyelids
  3. Creating a naturalistic nose and lips
  4. Drawing realistic eyelashes and eyebrows
  5. BONUS: Drawing the eyes, nose, and mouth like Doop

05. The Basics: Tones, Textures, and Shading


  1. Learn how shading and interplay of light and negative space expresses depth and spatiality
  2. Creating mood and atmosphere by hatching and smudging
  3. TIP: The easiest and most effective way to make your portrait look professional

06. The Next Step: Light, Shade and Tone


  1. Let’s learn how to depict powerful emotions on the face
  2. Let’s learn how to contrast white, black, and grey
  3. Let’s learn how light and shadow subtly change the atmosphere of the portrait

07. The Next Step: Hair


  1. How to flawlessly sketch hair
  2. Drawing hair while maintaining texture: Going from dark to medium to bright
  3. TIP: Drawing natural, lovely, and sleek hair

08. The Finishing Touch: Creating Your Masterpiece


  1. TIP: Choosing a good photo to draw
  2. Let’s learn how to determine basic shapes and contrast from your photo
  3. BONUS: Full Demo drawing based on the curriculum

Bonus: Lines and Tone


Supplementary practice: Polishing Lines and tones

Outro


Congratulations on completing the course!

Illustrator Doop

@mood.doop

Hello! I am Doop, an illustrator with 120K followers on Instagram and I have worked on dozens of brand collaboration projects. As an artist, I express emotions and strange atmospheres with my work. I draw lines in empty spaces, combining them to fill my drawings. This process when drawing was what made me decide to become an illustrator. I tend to draw at night, conveying my complex thoughts through lines and colors, as one would in a diary with writing.

People write, sing, or speak to express their thoughts and feelings. For me, drawing was a way of communicating with the world in ways I cannot with words. Drawing was the only time I could truly be honest with myself.

As more and more people watch and love my work, I feel grateful. What you draw, and how you draw are important, but I would love to share this joy of drawing with the rest of the world.

  • People who love to create and express themselves
  • People who tend to erase a lot when drawing
  • People who want a depth of expression in their portraits
  • People who want to improve and take their drawings to the next level!

(Materials actually used by the artist Doop)

  • Faber-Castel 9000 Graphite Pencil (HB, 3B)
    Used for overall sketches and base tones.
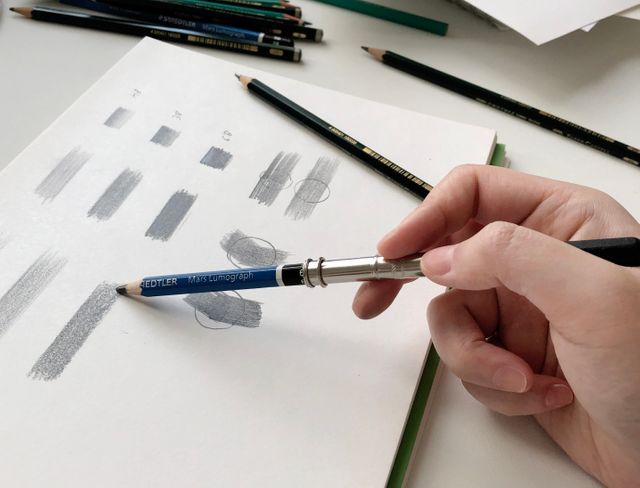
  • Staedtler Mars Lumograph Pencil (6B)
    Primarily used to emphasize the thickest part.
  • Tombow Pencil Eraser for Artist, Professional Use.
    Erases pencil lines neatly.
  • DM Sketch Pad (B5, 200g, 20sheets)
    Kent paper / Please note that the cover may change.
  • Sakura Gelly Roll Pen White (0.8mm)
    Used to express highlights during the final phase of drawing.
  • Staedtler Pencil Extender
    Used for short pencils.

Duration of the course

You can access the class videos for 20 weeks. Within that period, you can replay the videos in as many devices as you want.

Super Early Bird Offer

Once we pass the release date, we will no longer offered the class at "Super Early Bird". The rate will be raised after the date, right now is the cheapest deal you can get.

Installment Payment

Unfortunately, Paypal does not allow installments yet. (We're currently working on introducing installment payments.)

Class Preparation

If you have purchased the “All-in-one package,”
we will ship your package within the next 2 business days & it may take less than 2 weeks to get the package.
We will also send you a tracking number after we send the package. Due to the duration of delivery,
your access will be extended to 22 weeks.

Class Access

We will send you an email with a webpage link and a personalized code to access the videos within 24 hours of purchase.

You're all set! Don't feel like waiting? Here are classes you can start today
Live what you love with CLASS101

You may also like

Recently viewed